

How To Create Console Application In Visual Studio 2012
This browser is no longer supported.
Upgrade to Microsoft Edge to take advantage of the latest features, security updates, and technical support.
- Feedback
- Edit
Quickstart: Create your first console app in Visual Studio with Visual Basic
- 5 minutes to read
Thank you.
In this 5-10 minute introduction to the Visual Studio integrated development environment (IDE), you'll create a simple Visual Basic application that runs on the console.
Create a project
First, you'll create a Visual Basic application project. The project type comes with all the template files you'll need, before you've even added anything!
-
Open Visual Studio 2017.
-
From the top menu bar, choose File > New > Project.
-
In the New Project dialog box in the left pane, expand Visual Basic, and then choose .NET Core. In the middle pane, choose Console App (.NET Core). Then name the project HelloWorld.

If you don't see the Console App (.NET Core) project template, click the Open Visual Studio Installer link in the left pane of the New Project dialog box.

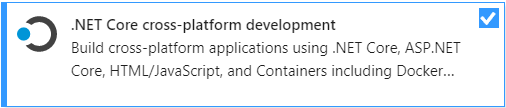
The Visual Studio Installer launches. Choose the .NET Core cross-platform development workload, and then choose Modify.
-
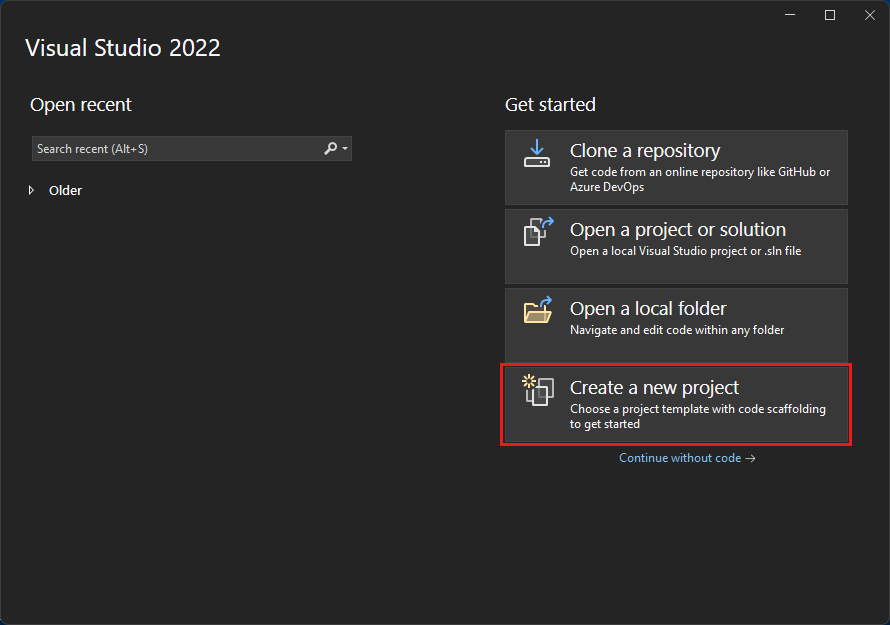
Open Visual Studio.
-
On the start window, choose Create a new project.

-
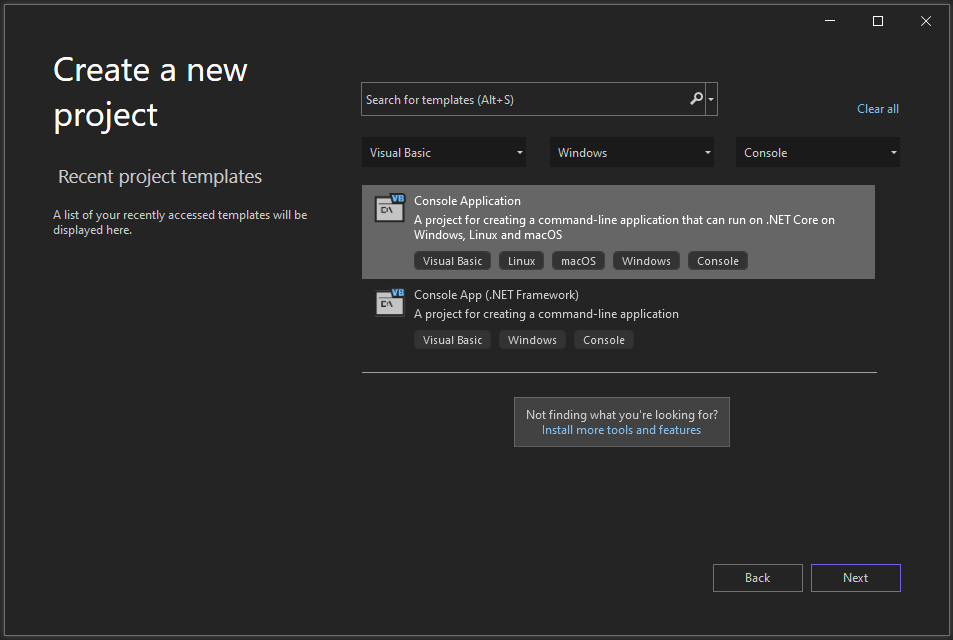
In the Create a new project window, choose Visual Basic from the Language list. Next, choose Windows from the Platform list and Console from the project types list.
After you apply the language, platform, and project type filters, choose the Console Application template, and then choose Next.

Note
If you do not see the Console Application template, you can install it from the Create a new project window. In the Not finding what you're looking for? message, choose the Install more tools and features link.

Then, in the Visual Studio Installer, choose the .NET Core cross-platform development workload.

After that, choose the Modify button in the Visual Studio Installer. You might be prompted to save your work; if so, do so. Next, choose Continue to install the workload. Then, return to step 2 in this "Create a project" procedure.
-
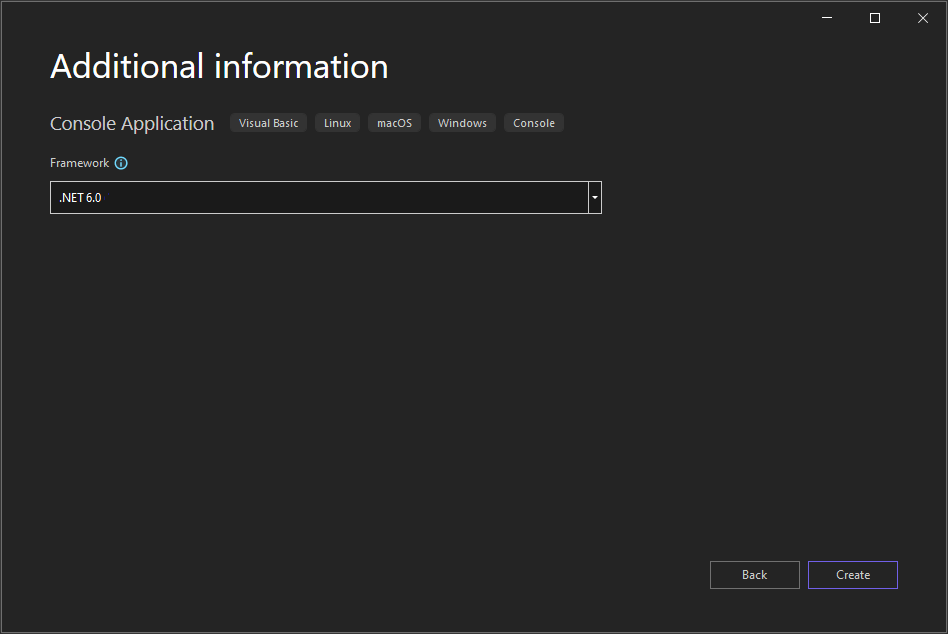
In the Configure your new project window, type or enter HelloWorld in the Project name box. Then, choose Next.

-
In the Additional information window, .NET Core 3.1 should already be selected for your target framework. If not, select .NET Core 3.1. Then, choose Create.

Visual Studio opens your new project.
-
Open Visual Studio.
-
On the start window, choose Create a new project.
-
In the Create a new project window, choose Visual Basic from the Language list. Next, choose Windows from the Platform list and Console from the project types list.
After you apply the language, platform, and project type filters, choose the Console Application template, and then choose Next.
Note
If you do not see the Console Application template, you can install it from the Create a new project window. In the Not finding what you're looking for? message, choose the Install more tools and features link.

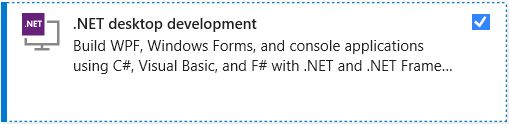
Then, in the Visual Studio Installer, choose the .NET desktop development workload.
After that, choose the Modify button in the Visual Studio Installer. You might be prompted to save your work; if so, do so. Next, choose Continue to install the workload. Then, return to step 2 in this "Create a project" procedure.
-
In the Configure your new project window, type or enter HelloWorld in the Project name box. Then, choose Next.

-
In the Additional information window, .NET 6.0 should already be selected for your target framework. If not, select .NET 6.0 in the Framework drop-down list. Then, choose Create.
Visual Studio opens your new project.
Create the application
After you select your Visual Basic project template and name your project, Visual Studio creates a simple "Hello World" application for you. It calls the WriteLine method to display the literal string "Hello World!" in the console window.

If you select the HelloWorld button in the IDE, you can run the program in Debug mode.

When the application runs in the Microsoft Visual Studio Debug Console, the console window remains open until you press a key.
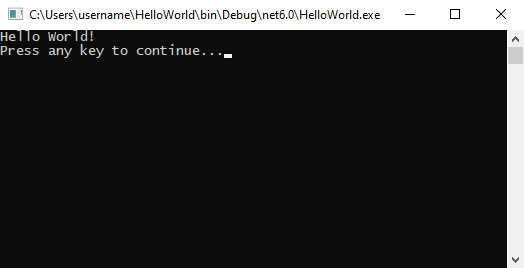
However, if you navigate to HelloWorld.exe in File Explorer and run it, the Main procedure terminates after its single statement executes and the console window closes quickly.
Add some code
Let's add some code to pause the application and then ask for user input.
-
Add the following code immediately after the call to the WriteLine method:
Console.Write("Press any key to continue...") Console.ReadKey(true)This pauses the program until you press a key.
-
On the menu bar, select Build > Build Solution.
This compiles your program into an intermediate language (IL) that's converted into binary code by a just-in-time (JIT) compiler.
Run the application
-
In Solution Explorer, right-click on HelloWorld to open the context menu for your project. Then, select Open Folder in File Explorer.
-
Navigate to the HelloWorld.exe file in the bin > Debug > net6.0 folder, and run it.
Now your application runs in the console and remains open until you press any key to close the console window.
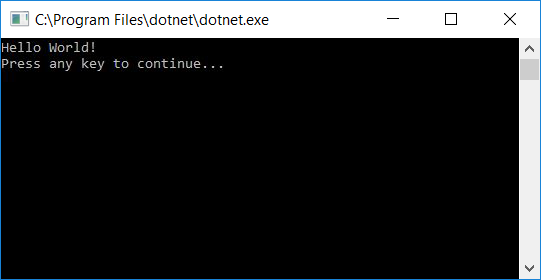
After you select your Visual Basic project template and name your project, Visual Studio creates a simple "Hello World!" application for you. The Program.vb file contains default code that calls the WriteLine method to display the literal string "Hello World!" in the console window.

Select the HelloWorld button or press Ctrl+F5 to run the default "HelloWorld" code in Debug mode.

When the application runs in the Microsoft Visual Studio Debug Console, the console window remains open until you press a key.
However, if you navigate to HelloWorld.exe in File Explorer and run it, the Main procedure terminates after its single statement executes and the console window closes quickly.
Add some code
Let's add some code to pause the application and then ask for user input.
-
Add the following code immediately after the call to the WriteLine method:
Console.Write("Press any key to continue...") Console.ReadKey(true)This code pauses the program until you press a key.
-
On the menu bar, select Build > Build Solution.
Building the solution, compiles your program into an intermediate language (IL) that's converted into binary code by a just-in-time (JIT) compiler.
Run the application
-
In Solution Explorer, right-click on HelloWorld to open the context menu for your project. Then, select Open Folder in File Explorer.
-
Navigate to the HelloWorld.exe file in the bin > Debug > net6.0 folder, and run it.
Now your application runs in the console and remains open until you press any key to close the console window.
Next steps
Congratulations on completing this Quickstart! We hope you learned something about Visual Basic and the Visual Studio IDE. To learn more, continue with the following tutorial.
Feedback
How To Create Console Application In Visual Studio 2012
Source: https://docs.microsoft.com/en-us/visualstudio/ide/quickstart-visual-basic-console
Posted by: rhodescapassicer.blogspot.com
0 Response to "How To Create Console Application In Visual Studio 2012"
Post a Comment